14 January 2008
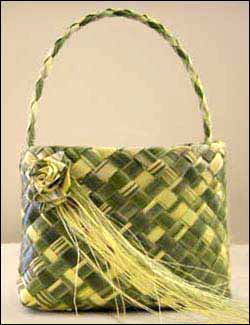 The top edge of a kete can be finished in many different ways and the one you choose will depend on the look you’d like for your kete. In this little kete I wanted undyed variegated flax to be the main feature, and this already made the design a bit busy, so I used a simple straight edge on the top. (Incidentally, although the colour of variegated flax will fade, the variations in tone will still be visible when it is faded).
Whether the kete is finished with a simple straight edge or in a more complicated way, it always looks best if it is finished neatly and evenly. This method, demonstrated by Cath Brown in a video I watched recently, gives a finish that looks both professional and attractive, as well as keeping the pattern of the weave intact, so I thought it was worth reproducing.
(In case you’re interested, the flax I used in the instruction photos was dyed, while still green, with Rit Rose Pink dye. I mixed 50 millilitres of dye solution into 0.75 litres of boiling water and immersed 75 grams of flax, or 8 strips at 0.8 centimetres wide, in the dye bath for about 5 minutes.)
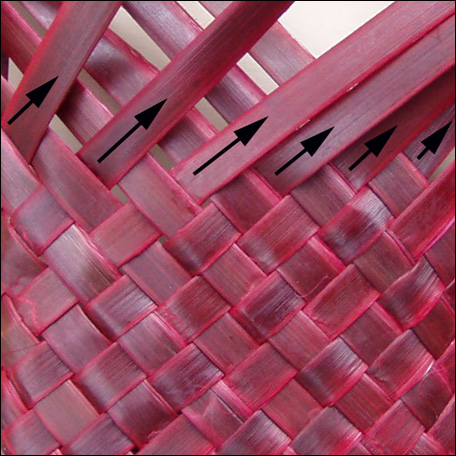
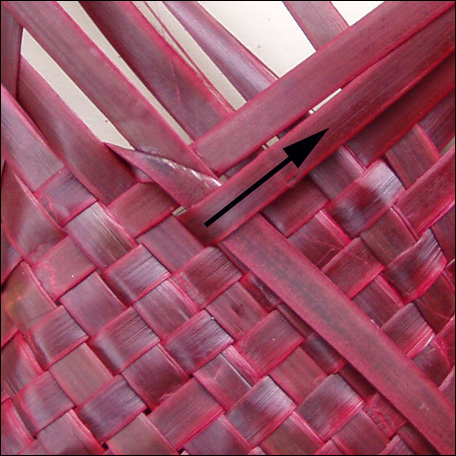
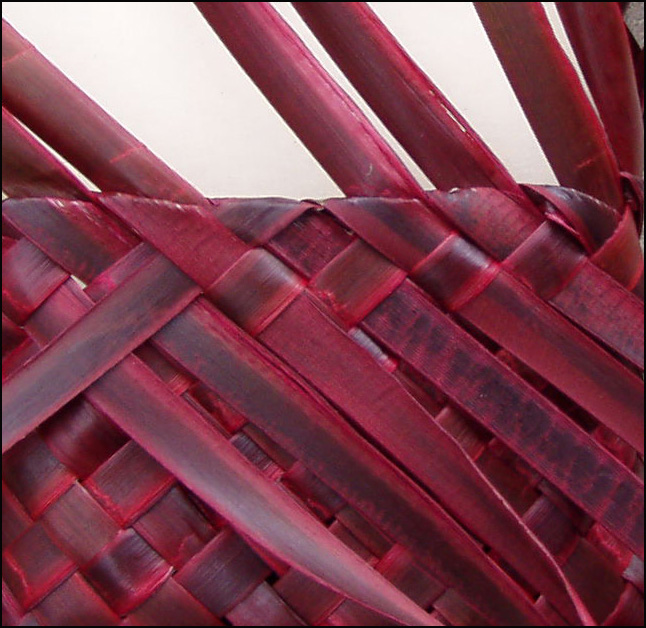
 Weave the kete to the height you want it. Start the straight edge by folding one of the top strips that is pointing up to the right, back on itself, so that it is lying pointing downwards to the left. Miss one strip along the top edge and take the next strip pointing up to the right, pull it out from underneath the strip it is lying under and fold it back down across the same strip that the first one is folded down on. The strip that is pointing up to the left is now lying alongside the fold of the second strip that was folded back, over the strip that was missed and alongside the fold of the first strip that was folded back.
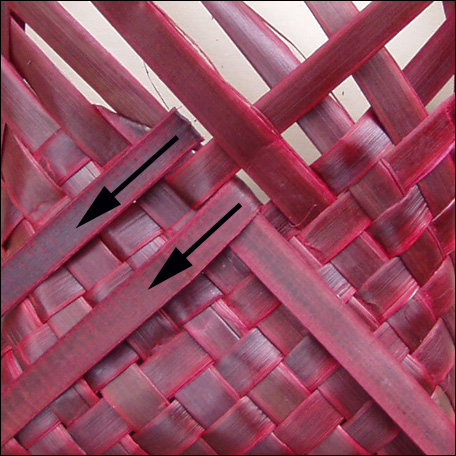
 Bring the first strip, that was folded back, forward again and then bend it downwards at an angle to the right so that it lies over the top of the strip pointing up to the left. Bring the second strip, that was folded back, up again to lock this strip in place. You will repeat this set of steps right around the top.
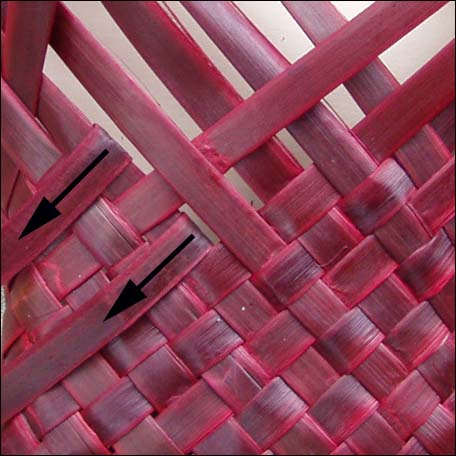
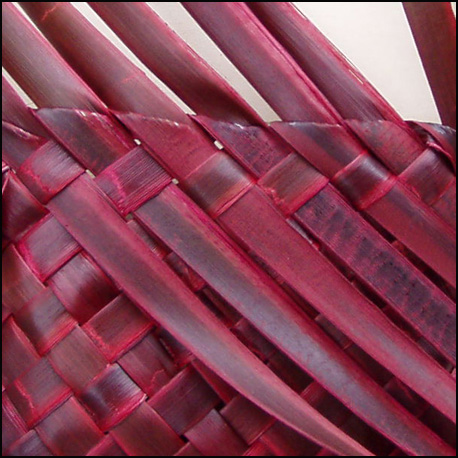 Start the next set of steps by folding back the next top strip, and the third one along, as in the first step. Continue with the rest of the steps. Then repeat this set of steps until you come back to the beginning. The first part of the straight edge is now finished. The strips you have folded down have formed a straight edge around the kete and there will be strips pointing up to the left all the way around.
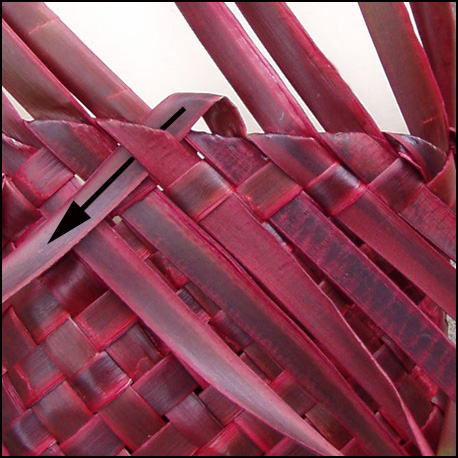
 The strips lying up to the left now need to be woven back down into the body of the kete. Take one of these strips and fold it down to the left, over the fold of the strip in front of it, and then thread it underneath the strip next to this one. Thread the strip down one more time through the next available strip.
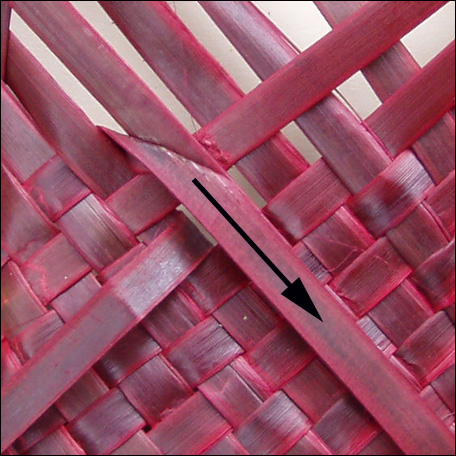
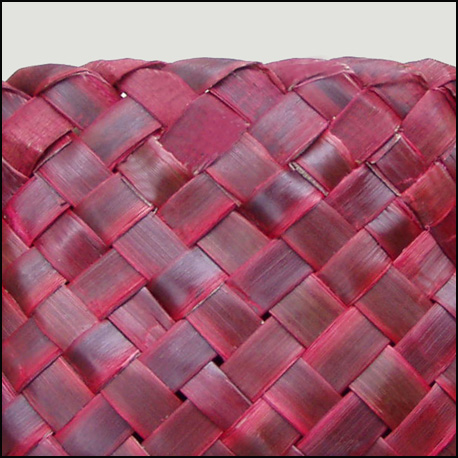 Complete this all the way around the top of the kete. Finish by simply cutting the ends off, or embellish the kete by fringing the ends or plaiting them around the kete.
Unfortunately this video featuring the late Cath Brown, is no longer available through NZ libraries and I can find no information about it being transferred to DVD format. It was made in the 1990s as a teaching resource for students at the Christchurch Teachers College. As well as providing a glimpse of how a very experienced weaver works with flax, including using her feet and toes to hold the flax in place, the video also shows Cath weaving a floor mat and a basket in a Pacific Island style.
© Ali Brown 2008. Last updated 2021.
Scroll down to leave a new comment or view recent comments.
Also, check out earlier comments received on this blog post when it was hosted on my original website as “Finishing the top edge of a kete”.